- Application Name. For example, Tooltest.
- Project Name. You can use the supplied default.
- Package Name. You can use the supplied default for a test app. Normally you would enter the reverse domain name of your company or project plus an application identifier (for example, com.mycompany.myapp). The package name must be unique and is used throughout the project, including as the "namespace" in your project's Pascal units.
Click Next.
Figure 1. Folders and files in a typical Eclipse Android project.
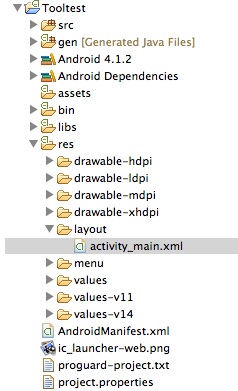
src - this is where the project's Java source files would go, but since we're developing with Pascal you won't use this folder.
gen - each time you build the project, Eclipse extracts resource identifiers from all of the project's XML resource files and creates a new R.java file; PBA converts R.java to Rjava.pas each time it's updated.
assets - database files, images, etc. can be placed here for deployment with your app.
bin - compiled files (.class extension) are placed here under classes; the .apk file that you deploy is created here too.
libs - place any .jar files that your app needs here; you can create a .jar file from compiled Pascal .class files as well as from compiled Java .class files.
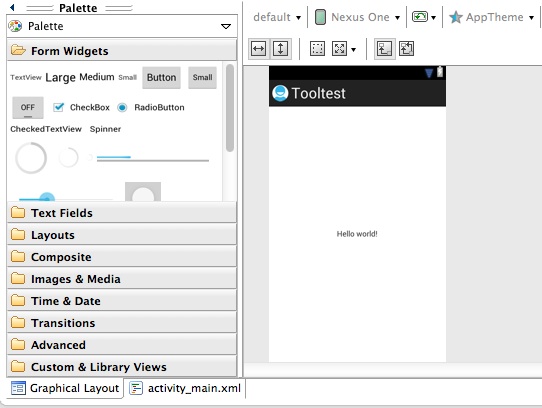
res - XML resource files go here; note how Eclipse has opened the activity_main.xml resource file in the Graphical Layout designer; you can also switch to a raw XML editor to view and edit a layout (see Figure 2).
AndroidManifest.xml - project's manifest file; normally you let Eclipse
manage this file.
Figure 2. Eclipse layout designer.
- In Eclipse, choose Project | Properties.
- In the Properties dialog, select Builders. Note the list of builders
that are already part of your project.
- Click Import and select Pascal Builder that you defined as an
external tool above.
- Select Pascal Builder and click Up to move it above Android Package
Builder in the build sequence.
Tip: If you get an error message, it may mean that you don't have PBA configured properly as an external tool. If you edit Pascal Builder's configuration, you'll need to delete the project's Pascal Builder and import it again to use the updated configuration.
To see your project's Pascal files (created by PBA), select your project in Package Explorer and choose File | Refresh. You should now see a pas folder in Package Explorer. Expand it and select MainActivity.pas. Right-click it and choose Open With | Text Editor to open it in Eclipse. You can also open Rjava.pas to see your project's resource identifiers. Note how MainActivity.pas references two resource identifiers.
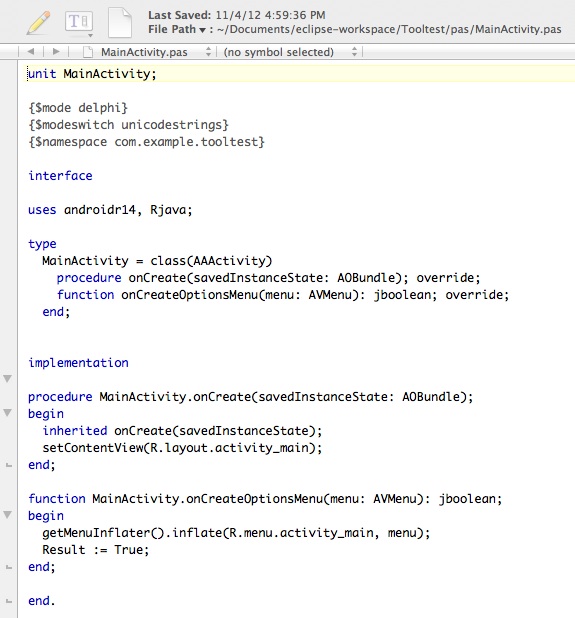
Tip: If you double-click a Pascal file, it will open with whatever program you have associated with the .pas extension. On my Mac, this is TextWrangler. If you prefer, you can then edit your source with a more familiar editor instead of in Eclipse's editor (see Figure 3).
Figure 3. Pascal boilerplate code for Android "activity" (as viewed in TextWrangler).
Right-click your project in Package Explorer and choose Run As | Android Application. Eclipse will launch the Android emulator and, after a lengthy delay, your app will start, displaying "Hello world!". Press the Esc key to exit the app in the emulator.